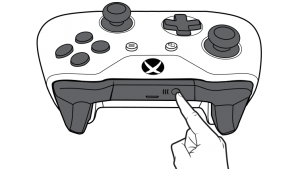
Have you just received your brand new Xbox One controller and can’t wait to put it on a play mode? But wait, do you know how to connect the Xbox One Controller to your Windows PC? No? Don’t worry! I got you covered.
In this informative article, I am going to walk you through three different ways, and the corresponding steps involved in connecting the Xbox One controller to your PC.
How do I connect my Xbox one controller to my PC
Below are the three different ways to use Xbox One controller with Windows PC.
- Connect your Xbox One Controller using a USB Cable.
- Connect your Xbox One Controller using a wireless adapter.
- Connect your Xbox One Controller using Bluetooth.
Way 1: Connect your Xbox One Controller using a USB Cable
This method is applicable for wired and wireless Xbox One controller.
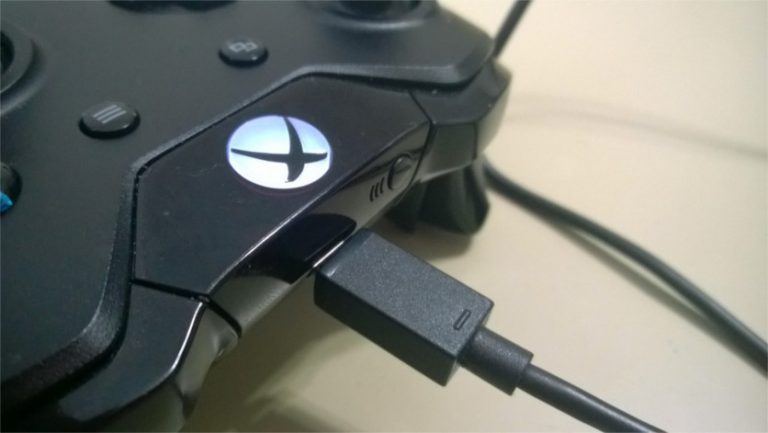
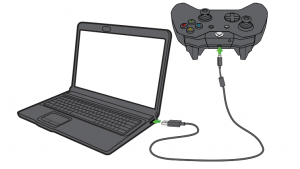
Step 1: If you own a wired Xbox controller, then you can skip this step. If your Xbox one controller is wireless then Plug the one end of the USB cable into the top front of your controller.
Step 2: After the initial step, plug the other end of the USB cable into the USB slot of your windows PC.
After following the above steps, now your Windows will automatically install all the Xbox one controller driver, in case if it fails to do so, then you can carry forward with the ways of troubleshooting to update the Xbox One controller drivers.
Way 2: Connect your Xbox One Controller using a wireless adapter
Beside USB Cable, the other way to connect your Xbox One controller with PC is through the Xbox wireless adapter.
Step 1: Microsoft has a new standard called Xbox Wireless adapter to connect an Xbox wireless controller. There are very few chances that this functionality is inbuilt into your PC, if not? then you have to first buy Xbox wireless adapters.
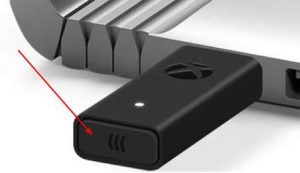
Step 2: After you buy Xbox wireless adapter, then plug it into your PC and press the button present on the edge of the device to activate it, and this process correspondingly downloads all the necessary drivers to connect your Xbox One controller automatically.
Step 3: Make sure your Xbox Controller is all powered up with batteries and Press the Xbox button to turn on your controller.
Step 4: The full and final step, press the controller blind button and you will see the LED light on the Xbox Controller and adapter blinks for a few seconds and then goes solid. Hurray! Your Xbox One controller is finally attached to your Windows PC.
Way 3: Connect your Xbox One Controller using Bluetooth
To connect your Xbox One controller via Bluetooth, your Xbox One controller and your Windows PC must have Bluetooth compatibility.
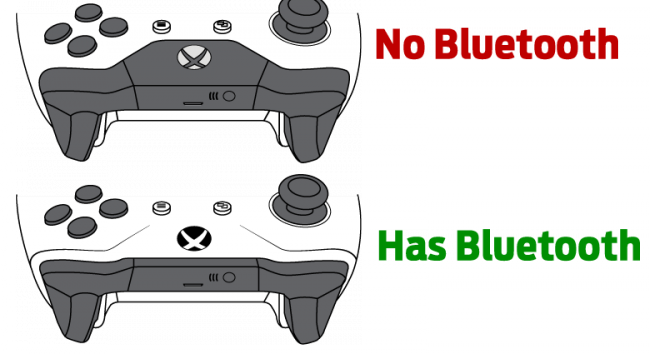
Note: From the above picture you can check whether your Xbox One Controller has Bluetooth compatibility or not. If the plastic around the Xbox buttons is part of the face of the controller, then your Xbox Controller has Bluetooth.
After you checked all the things specified above, let’s get back to the Steps involved in connecting Xbox One Controller to PC via Bluetooth.
Step 1: Make sure the Bluetooth on your PC is turned ON.
Step 2: Now turn on your Xbox wireless controller by pressing the Xbox button.
Step 3: After that, press the controller connect button for at least 3 seconds and release.
Step 4: On your Computer, select Start Menu, then Settings > Devices > Bluetooth & other devices.
Step 5: Add Bluetooth Device of your Xbox One Controller and click Pair.
Hurray! Your Xbox One Controller is now connected to PC via Bluetooth.

