As a gamer, it is one of the bucket list items to build yourself a gaming PC and I am glad you are also thinking of making one! By the way, I built my first computer when I was 20, doing my graduation. Since then, I have made many builds and experimented a lot with gaming PCs to squeeze out the best performance yet being affordable to build.
So, without any delay, let’s get straight to the work! Below are the components that I have used to assemble my latest build.
My PC Build Overview
For this post, I am building a gaming pc that is affordable and powerful enough for high-end games too! If you will use the exact same components that I have listed below, you’ll have to shell out around 1500 bucks only.
- Processor: Intel Core i7-8700K
- Motherboard: MSI Z370 Gaming Pro Carbon AC
- Memory: G.Skill TridentZ RGB 16GB DDR4-3200
- Graphics card: Nvidia GeForce GTX 1070 Founder’s Edition
- OS SSD: Samsung 970 Evo 500GB
- Data HDD: Intel 760p 2TB
- CPU Cooler: Cooler Master Hyper 212 Evo
- Power supply: EVGA SuperNova 850 G3
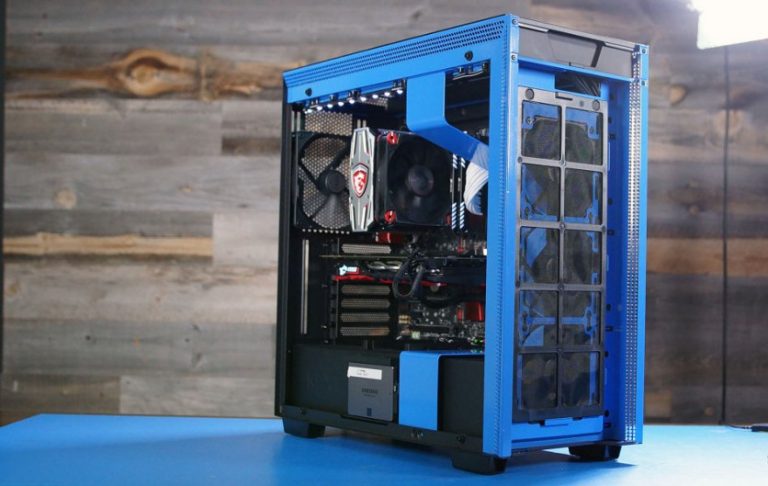
- Case: NZXT H700i
You may choose to go for other components if you have the budget but the installation process is more or less the same.
Things that You’ll Need
You will need a large surface to work on, such as a table. To prevent an accidental electrostatic discharge (which can damage sensitive components), make sure you stand on an uncarpeted surface.
Screwdrivers: You will need a Phillips #2 screwdriver for just about everything. Using a magnetic screwdriver will prevent you from dropping screws inside your case (the magnetic tip is very weak and shouldn’t have any effect on your components). If you’re installing an M.2 device, you’ll need a Phillips #0 screwdriver.
Organization System: Most components come with additional parts; some optional, some required for installation in your build. You’ll need a way to keep assorted screws, zip ties, cables, manuals, etc. organized by individual component — without proper organization, these items can be easily mixed up.
Anti-static Wrist Strap: Not strictly necessary, but useful to ensure you don’t accidentally damage sensitive components with electrostatic discharge. (This isn’t a very common occurrence, but it’s better to be safe — and anti-static straps are cheap.)
Zip Ties: Not strictly necessary, but tying your cables together will make the inside of your PC look much better. If you don’t want to buy zip ties, you can neaten things up with twist-ties (you’ll have a bunch from your components’ wiring). You can also use Velcro straps — some cases have them integrated.
Scissors: For cutting zip ties and unpacking components.
 Not sure what components to buy and what things are necessary while building a gaming PC? Read the Gaming PC component guide and then continue with steps below.
Steps to Build a Gaming PC
Follow the steps below to build your gaming PC by yourself without burning a hole in your pockets.
Step 1: Install the CPU
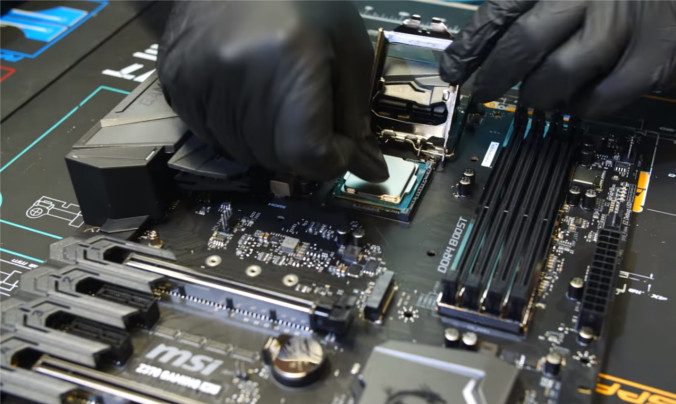
Take the motherboard out of its antistatic packaging and put it on your work surface. Find the CPU socket, which will be covered with a protective plastic cap. In one corner of the plastic cap, or more commonly, on the socket itself, you’ll see a small arrow — take note of where this arrow is.
You do not need to remove the plastic cap — when you install the CPU, the tension of the installation will cause the cap to pop off. If you try to remove the cap yourself, you could end up hitting and damaging the fragile pins underneath.
Next, to the CPU socket, you’ll see a small metal lever. Press down on the lever and pull it gently to the side (away from the socket) to open the socket tray.
Open the CPU and remove it from its packaging. Be very careful when handling the CPU — both the CPU and the CPU socket are extremely susceptible to physical damage. Hold the CPU on the edges — never touch the pins on the bottom of the chip, because your fingers can add dust or oil, and try not to touch the top of the chip either.
In one corner of the CPU, you’ll see an arrow. Line this arrow up with the arrow on the socket, and gently place the CPU onto the socket.
 Pro-tip: The CPU only fits one way, and does not require any force to be seated. You can gently move the CPU to seat it, but do not jostle, push, snap, or otherwise try to force the CPU into the socket.
Once the CPU has been gently seated, you can lower the retention lever down and push it back into place. Lowering the lever may require some force, but seating the CPU will not!
Step 2: Install the M.2 SSD
If you want to install an M.2 SSD, now is a good time to do so. First, find the M.2 slot on your motherboard. It’s a small, horizontal slot with a tiny screw across from it. If you can’t find it, if you find multiple M.2 slots, or if you are planning on installing more than one M.2 SSD, consult the user manual that came with your motherboard.
Remove the tiny screw with a Phillips #0 screwdriver. Don’t lose it.
Slide the M.2 SSD gently into the slot. When it’s fully seated, it will stand off the motherboard about a 35-degree angle. Push the SSD down and replace the tiny screw to lock it in place.
Here’s my tested list of SSDs for gaming PC from which you can choose a good solid state drive for your build.
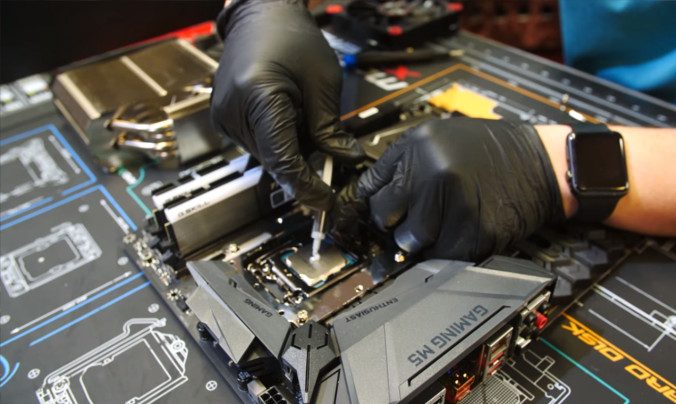
Step 3: Install CPU Cooler
There are different types of CPU coolers. For exact installation instructions, we recommend you consult the manual that came with your CPU cooler.
Some coolers require a mounting bracket. The motherboard may have a bracket pre-installed; you may need to remove this bracket if your cooler doesn’t need a bracket, or replace this bracket if your cooler uses a different bracket. Do this before putting the motherboard inside the case.
Some coolers come with thermal paste pre-applied to the conductive material (which sits on the CPU) and some coolers do not. If your cooler does not have pre-applied thermal paste, you will need to manually apply thermal paste before you seat the cooler. To apply thermal paste, squeeze a small dot (no larger than a grain of rice) onto the middle of the CPU. Then, place the cooler on the CPU — the pressure will spread the thermal paste adequately.
The first squeeze of thermal paste should be onto a piece of scrap paper, just in case a big glob accidentally comes out.
If your cooler has pre-applied thermal paste and you want to use a good thermal paste, you can remove the thermal paste with 90% isopropyl alcohol and lint-free cloth — we recommend an automotive-grade paper towel.
If you mess up the installation, don’t panic. Clean off the thermal paste (from both the CPU heat spreader and the cooler) and re-apply, then install again.
Pro Tip: When attaching the cooler to the motherboard, tighten the screws in a cross pattern to ensure evenly-distributed pressure. If you get confused, this process will likely be described in detail in your manual.
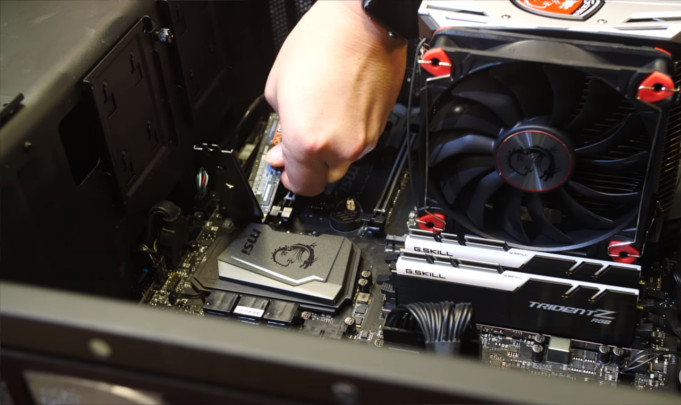
Step 4: Install Memory (RAM)
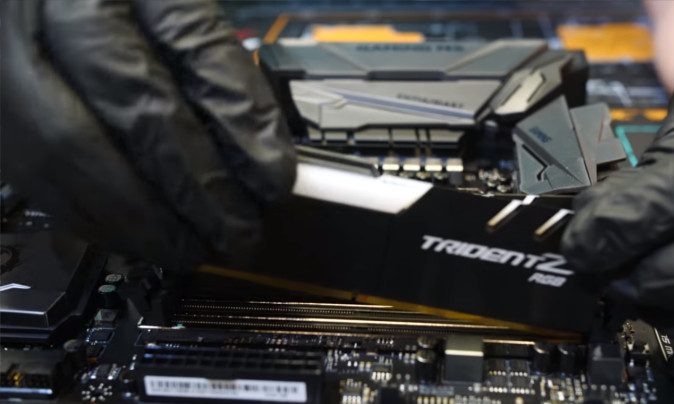
Look on the motherboard or in the manual and determine the number of RAM slots available on the board. In my case with MSI Z370 GODLIKE Gaming, there are four DIMM slots (generally there are two or four RAM slots).
You can either use all the available RAM slots, just like I did with 4x 4Gb memory sticks. Otherwise, you can use one or two slots and leave the rest empty for future usage.
Snapping the RAM in the slot is probably the easiest but keep an eye on the notch on the bottom side. It is a little off from the center and must be aligned accordingly sit correctly in the slot.
Step 5: Quick Test outside the PC Case (Optional)
Though this is optional, I highly recommend you do a quick test once to make sure everything is working before putting it all inside the case. Because it can be hectic to take apart everything from the case and troubleshoot if something does not work.
So, now we have installed the processor, RAM and CPU cooler on the board. Just push the GPU in the PCIe slot and connect the power supply to the motherboard. Make sure you have connected both CPU (8pin and 24pin) along with the GPU. Once everything is in place, plug in and turn on the power supply.
On some motherboards, you may see power switch but its not common. Even my MSI Z370 Godlike didn’t have one. To power it on check the motherboard manual to locate the power switch pins (generally labeled as ‘PWR_ON’). Just use the screwdriver and touch both the pins simultaneously.
If you are lucky enough, the motherboard will power on in the first go (doesn’t happen a lot of times 😛 ). Sometimes, the motherboard will start beeping or blinking the lights, this indicates some part failure. You may want to check the motherboard manual or my troubleshooting guide to find out the error and a recommended fix.
Once you are sure everything is working, just turn off the power supply and wait until all the LEDs on the motherboard turn off. Remove the GPU, unplug all the cables and proceed with the next step where we will assemble everything inside the PC case.
Step 6: Mount the Power Supply
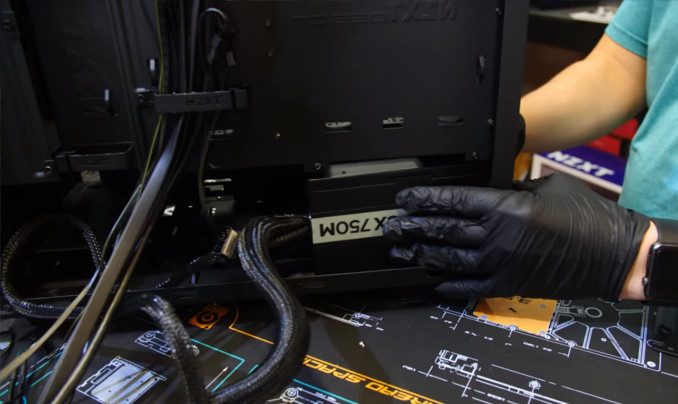
If you skipped the previous step, its time to unpack the Power Supply and set aside the cables otherwise just unplug it from the board.
Next, you need to figure out the right position of PSU inside the PC case. As I am using the NZXT H700i PC case, the PSU goes on the bottom back side mounted with screws. You can see your PC case manual diagram to see which mount is meant for power supply and its correct orientation.
Ideally, the PSU must be placed in such a way that the fan faces outside the case so that the heat from the power supply can be discarded effectively.
Depending on the PC case you are using, there can be a vent on the bottom where the power supply unit can be installed provided that there’s enough airflow through it.
In rare cases, if you are not able to find out the right spot, just place the PSU inside the case with the fan facing upwards.
Once you are sure about the position and orientation, attach the PSU to the case using the four screws that came with the PSU.
The PSU that I am using for this gaming PC is the EVGA SuperNova 750 G3 which is fully modular, so cable management isn’t much of an issue. If you’re using a non-modular or semi-modular PSU, then you must run all the power cables through the case to reach the respective pins on the motherboard.
Step 7: Install the Motherboard in the PC Case
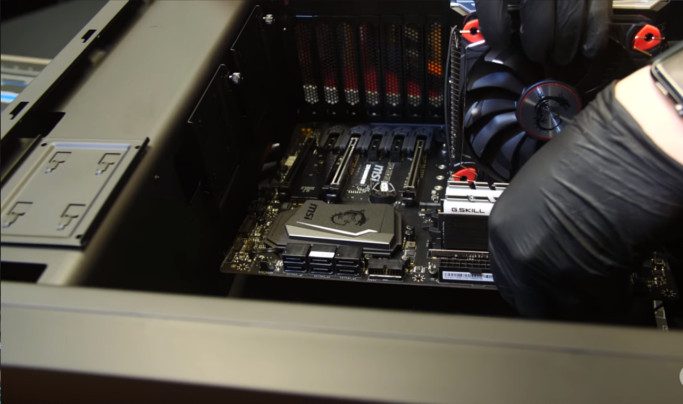
Now, take the motherboard with CPU, RAM and CPU cooler installed on it and check if the I/O shield is in place or detached.
The I/O shield is basically a rectangular metal sheet having cutouts for the ports on the motherboard. First, snap the i/o shield at the back of your case in the correct orientation.
 Watch your hands and fingers while fitting the I/O shield. They usually have sharp edges, which may cause injury.
After the I/O shield is installed, now put the motherboard inside the case. It could be a little tricky because of the number of cables involved. Make sure each of them passes through the right holes to avoid breaking them.
Now use the screwdriver and mount the center screw to fix the motherboard in place and avoid dragging the across the standoffs. There can be as many as 9 screws on your motherboard depending on the form-factor. Fit all the screws in place to hold the motherboard perfectly.
Once it’s fixed, connect the PSU to the motherboard. The cables from the PSU will go into the 8-pin CPU connector near the top and the 24-pin connector on the side edge.
Before you mount the motherboard, check to make sure the case has motherboard standoffs installed. These usually look like a nut with threading on the end. Do not insert unnecessary standoffs.
Step 8: Slot in the Graphics Card (GPU)
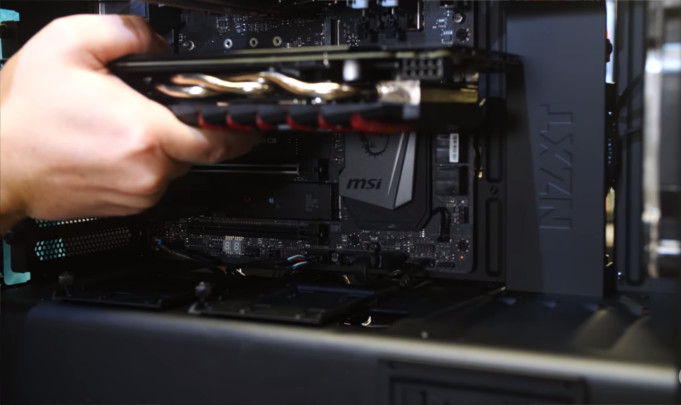
For this build, I have chosen the Nvidia GeForce GTX 1070 Founders Edition graphics card. The GPU goes into PCIe x16 slot on your motherboard (generally in the longest slot).
Remove the antistatic packaging from the GPU and align it carefully between the slot and the retention bracket on the backside of the case. Now, gently push GPU into the desired PCIe x16 slot. I just love the satisfying click sound it makes as it sits properly into the slot.
Most standard ATX motherboards have more than one PCIe x16 slot. Sometimes, one of the slots needs to be prioritized to get the best performance. Also make sure that there is enough breathing room for the GPU as there will be heat around it.
To make the I/O ports such as HDMI, DisplayPort, DVI, etc. of your GPU accessible from the back side of your case, you may have to remove the respective cutouts on the exterior of the chassis.
Optionally you can secure the GPU with a couple of screws to the back of your case depending the GPU and case combination your are using. Don’t forget to connect it to the power supply if your GPU requires auxiliary power.
Step 9: Install the Hard Drive
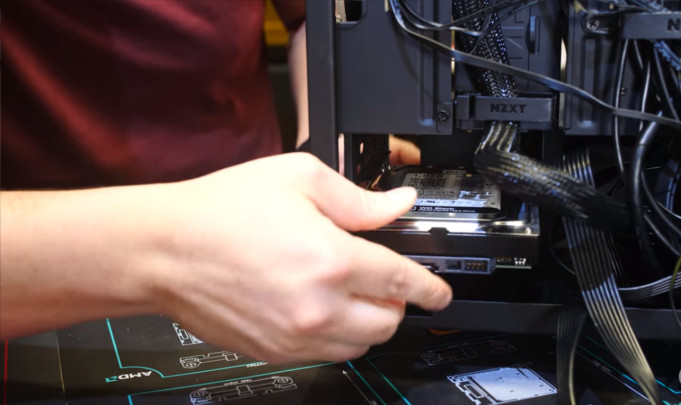
Now, you are build has technically everything but the storage to keep all your favorite games.
Look at your case — every case is a little different when it comes to drive bays. You should be able to find a stack of bays in different sizes somewhere inside your case. They may have little plastic switches, in which case they are tool-free bays, or they may just look like metal brackets.
Storage generally comes in two sizes, 2.5-inch (HDDs and SSDs) and 3.5-inch (HDDs). Most 3.5-inch bays can accept 2.5-inch drives, but not vice-versa (some 3.5-inch bays will have trays that aren’t designed for 2.5-inch drives, but they can still fit 2.5-inch bays).
You may also see larger bays in your case — these are for larger drives such as optical drives and are usually located in the front of the case, near the top.
Pro Tip: If you have trouble finding the bays or figuring out what type of bays your case has, consult your case’s user manual.
If you have tool-free bays, each bay will have its own plastic lever or switch. Open or unlock the lever or switch and you should be able to pull out the tray. Place your drive in the tray — some 3.5-inch trays will be designed to accept 2.5-inch trays. If they are, you’ll need to screw the 2.5-inch drive to the 3.5-inch tray so it doesn’t move around.
Slide the tray back into the bay. It should click into place.
If you don’t have tool-free bays, you’ll see a metal bracket (it will be big, like a sheet), with slats or holes in it. To put a drive in one of these “bays,” all you have to do is slide the drive between the metal bracket and the side of your case and screw it into place. Use as many screws as the chassis manual recommends, but if you don’t have enough screws most drives will be fine with just two screws.
Once your drives are all in place, connect them to the motherboard (using a SATA cable, which should have come with either your drive or your motherboard) and to the power supply.
Step 10: Add Peripherals & Install the OS
Now it’s time to install your operating system (OS). Determine which OS you want to install on your PC and download the installer on a flash drive. You can download the installer for Windows* 10 here. If you are installing a paid OS such as Windows, you will need a product key.
Plug in the flash drive that contains your OS, as well as a monitor, mouse, and keyboard, and turn on your PC.
If the PC doesn’t turn on at all, you might have a problem with your power supply. If the PC turns on but you don’t see anything on the screen, or it doesn’t seem to start up, check to make sure all cables, especially power cables, are connected.
The first screen you see will tell you to press a key to enter the system setup or BIOS. Press the key to open BIOS. (If the screen flashes off too quickly for you to see the key, consult your motherboard’s user manual.)
First, you’ll want to check to makes sure your components are all installed and being recognized. Find the page in BIOS that shows your PC’s system info (different motherboards have different BIOS setups, but you should be able to find a screen that gives you this information) and check to make sure the system is recognizing everything you’ve installed so far.
Next, poke around BIOS until you find the Boot page (may be called “Boot Order” or “Boot Priority”). Change the boot order so that your flash drive is first and the drive you want to install your OS on (if you’re using an SSD as a boot drive, you will want to install the OS here) is second.
Restart your computer. Your computer will boot from the USB and the OS installer will pop up. Follow the instructions to finish the installation.
If you have trouble booting to the USB drive, ensure the motherboard is set for the installation type you are attempting. Most UEFI-enabled platforms will boot to the UEFI partition scheme first before attempting Legacy.
While building a gaming PC, there can be some issues that may prevent your PC from working as expected. Please refer to my Gaming PC Troubleshooting Guide that will resolve most common PC issues that you may face.
Choosing the Right Components for Gaming PC
No matter if you are building your first gaming PC or 10th, it is always a definitive task to choose the right components to ensure great performance especially when it comes to gaming.
Components like the motherboard, RAM, GPU and PC case etc. come at varying costs and there are chances that you’ll end up paying more for something that you didn’t even require.
So, to make sure that you stay on your budget and still get the powerful components, I have nailed down this guide explaining everything you need to know about each of the components that goes in your gaming build.
Choosing the PC Case
Before you start picking out components, you should have a case — or, at least, a case size — in mind. The main thing to keep in mind when picking a case is where you’re going to put the computer.
Your PC’s final location will dictate how big you can (or cannot) go, and it will also help determine whether various premium case features are worth splurging on — you probably don’t want to pay for a tempered glass side panel if the computer will be hidden under your desk.
Cases typically come in three sizes: Full-tower, mid-tower, and mini-tower.
These are very general categories (case sizes are not standardized among manufacturers), but they’re based on motherboard size: Full-tower cases are designed to fit both Extended-ATX motherboards and standard full-size ATX motherboards; mid-tower cases are designed to fit standard full-size ATX motherboards; and mini-tower cases are designed to fit a number of smaller motherboards, such as mini-ITX motherboards.
Generally speaking, mid-tower is the most common case size. Mid-tower case dimensions can vary quite a bit, but these cases usually measure around 18 – 20 inches tall, 17 – 20 inches long, and 6 – 8 inches wide.
Mid-tower cases or mATX cases are usually roomy enough for a gaming setup with a couple of graphics cards, several hard drives, and a modest cooling system.
Full-tower cases are larger than mid-tower cases — they usually measure around 22 – 24 inches tall, 18 – 20 inches long, and more than 8 inches wide. You’ll most likely need a full-tower case if you want to use an Extended-ATX motherboard (although select mid-tower cases do fit Extended-ATX motherboards), or if you want to put in an extensive cooling system or additional storage.
Mini-towers, or small form factor (SFF) builds, are designed generally on small mini ITX cases. While SFF builds have come a long way in the last few generations, mini-towers — specifically those using mini-ITX motherboards — require you to carefully plan components (you may need to use components that are specifically made for small builds, such as half-length GPUs) and cooling, and leave little room for upgrading once the build is finished. For this reason, I don’t advocate SFF builds for new builders, but they can be a fun challenge if you’ve already got a build or two under your belt.
Once you figure out how big you want to go, look for a case that’s close to that size. If you’re not set on a specific size, it’s better to err on the larger side — bigger cases are easier to work with and you’ll have an easier time upgrading your PC in the future. That said, while a little bigger is good, significantly bigger isn’t necessarily better: Large cases can end up with hotspots if not properly cooled.
You may refer to my guide on Mini ITX vs Micro ATX vs ATX form factors to know which PC case will suit the best for your gaming PC.
My Recommendation: NZXT H700i ATX Mid-Tower
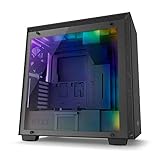
- Premium quality: All steel construction with the...
- Smart device: Built in rgb and digital fan...
- Adaptive noise reduction: Optimizes cooling and...
- All new cable management system: Installation and...
- Full tempered glass panel: Showcase your build...
Last update on 2020-03-20 / Affiliate links / Images from Amazon Product Advertising API
All case sizes are available at different price points, so finding a case that fits your budget shouldn’t be difficult. More expensive cases may have premium and convenience features such as noise dampening, higher-quality build materials, removable drive cages, and more attractive cable management, but these features typically won’t noticeably affect performance.
Selecting the Motherboard
The motherboard is the main circuit board and is connected to everything. The CPU sits directly on the motherboard (your CPU and motherboard must be compatible — Intel’s Desktop Compatibility Tool can help) and every other component — graphics cards, hard drives, memory, optical drives, wireless cards — integrates into the motherboard.
Motherboards come in a few different sizes. The most common form factors are Extended ATX, ATX, Micro-ATX, and Mini-ITX.
The Extended ATX is the largest (12 by 13 inches or 12 by 10.1 inches) and can often have eight RAM slots (for up to 128GB of RAM). The ATX is only slightly smaller (12 by 9.6 inches) but usually tops out at four RAM slots. The Micro-ATX motherboards (9.6 by 9.6 inches) can also have up to four RAM slots, but the Mini-ITX motherboard (6.7 by 6.7 inches) only has two.
My Recommendation: MSI Z370 Gaming Pro Carbon AC
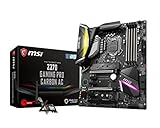
- Supports 8th Generation Intel Core, Pentium, and...
- Intel Z370 Express Chipset
- Form Factor: ATX
- 4 x DDR4 memory slots supporting up 64GB
- Supports 2-Way NVIDIA SLI
Last update on 2020-03-20 / Affiliate links / Images from Amazon Product Advertising API
Choosing the Processor (CPU)
The Central Processing Unit (CPU), also known as the processor, is basically the brain of your PC. This is where the magic happens — when a computer program runs, it sends a list of instructions (which are actually more like tasks) to the CPU. The CPU performs each “instruction” and sends signals to other components to let them know when they need to perform a task.
There are two main performance metrics associated with CPUs: Core count and clock speed. Core count tells us how many processors the CPU has — in other words, how many tasks the CPU can perform simultaneously — while clock speed tells us how quickly the CPU is performing each task. Some higher-end CPUs feature hyper-threading, which allows each core to run multiple threads and offers improved performance on threaded software.
My Recommendation: Intel i7-8700k
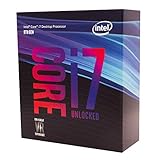
- 6 Cores / 12 Threads
- 4.70 GHz Max Turbo Frequency / 12 MB Cache; Memory...
- Compatible only with Motherboards based on Intel...
- Intel Optane Memory Supported
- Intel UHD Graphics 630
Last update on 2020-03-20 / Affiliate links / Images from Amazon Product Advertising API
Most modern CPUs are multi-core and many modern games are designed to take advantage of this, so you should look for a CPU with at least four cores. Additional cores can be helpful as you start layering on more tasks, such as recording and streaming your gameplay.
Are you also confused between using an AMD Ryzen or Intel processor for your gaming PC? Here’s why I chose Intel CPU and not Ryzen.
Choosing the RAM
Random Access Memory (RAM) is your PC’s short-term memory — it’s faster and easier to access than your PC’s long-term memory (storage, e.g. hard drives), but it’s also temporary. This is where the PC stores data that it is actively using (those “instruction lists” that the CPU needs to read and execute).
Figuring out how much RAM you need can be tricky, because having more RAM than you use will do nothing (except waste money), and having too little RAM will negatively affect performance. Ideally, you want the perfect amount of RAM for you/your build. (But generally speaking, the average gaming rig needs 8 – 16GB of RAM.)
The most important thing to keep in mind when choosing a gaming RAM is what your motherboard and processor can support. RAM that’s faster than what your system supports will downclock to run at your system’s capabilities.
My Recommendation: G.Skill TridentZ RGB Series 16GB
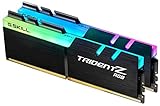
- DDR4 3200 (PC4 25600)
- Timing 16-18-18-38
- Cas Latency 16
- Voltage 1.35V
Last update on 2020-03-20 / Affiliate links / Images from Amazon Product Advertising API
Pro-tip: If you decide to go with high-speed RAM, look for RAM with Intel® Extreme Memory Profile (Intel® XMP) support. High-speed RAM will run at a standard (lower-than-advertised) speed unless it’s overclocked, and Intel® XMP makes this easy to do with predefined and tested profiles.
Power Supply Unit
The Power Supply Unit (PSU) isn’t a particularly exciting component, but it’s critical nonetheless. Don’t cheap out here — the PSU needs to be well-made and powerful enough to handle all current and future components, and it doesn’t hurt to have a good warranty. Remember, the PSU will be powering all of your other components.
PSUs come in non-modular, semi-modular, and full-modular styles. Non-modular PSUs have all cables permanently attached — this is the cheapest option, but you’ll need to find a place to stuff all the cables you’re definitely not going to use. Too many unused cables result in poor cable management, which can obstruct airflow and end up affecting your PC’s performance.
Semi-modular PSUs are the best option for most people — these units come with a handful of essential cables attached and are cheaper than full-modular styles. Full-modular PSUs are even easier to work with than semi-modular PSUs, but you’ll be paying for the added convenience.
My Recommendation: EVGA SuperNOVA 850 G3
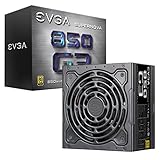
- EVGA 850 G3: The Next Generation in Power
- 80 PLUS Gold certified, with 90percentage (115VAC)...
- Fan size/ Bearing: 130 millimeters Hydraulic...
- Heavy duty protections, including OVP, UVP, OCP,...
- 10 year Warranty
Last update on 2020-03-20 / Affiliate links / Images from Amazon Product Advertising API
Pro-tip: If you buy a PSU online, make sure you buy the correct one for your country/region. You can also refer to this list of PSU for gaming PC.
Selecting the Graphics Card (GPU)
There are two types of graphics processors: Integrated and discrete. Integrated graphics processors are integrated with the CPU. Integrated graphics have improved significantly throughout the years, though they are still generally less powerful than discrete graphics.
Discrete graphics cards are large, powerful components that plug into the motherboard via PCIe*, and come with their own resources, including video memory and (usually) an active cooling system. A discrete graphics card is a must-have for gamers who play any of today’s demanding, graphics-heavy games.
Serious gamers will want to look for graphics cards that produce consistent frame rates of at least 60 frames per second (FPS) at your desired resolution (anything lower may look choppy), while gamers looking to play in virtual reality should look for cards that produce consistent frame rates of at least 90 fps.
High-end graphics cards like the GTX 1080 are expensive. If you need to cut costs, look to the last generation — the previous generation’s GPU may offer similar results at a lower price point.
My Recommendation: Nvidia GeForce GTX 1070 Founders Edition
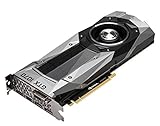
- Powered by the NVIDIA GeForce GTX 1070 graphics...
- 8GB GDDR5 (256-bit) on-board memory
- PCI Express 3.0 x16 interface
- NVIDIA CUDA technology
- VR-ready
Last update on 2020-03-20 / Affiliate links / Images from Amazon Product Advertising API
Pro-tip: The GPU isn’t the only component that affects framerate, so it’s important to balance out your build or you’ll run into performance bottlenecks elsewhere.
Choosing Hard Drive or SSD
There are two main types of storage: Solid-state drives (SSDs) and hard disk drives (HDDs). There are pros and cons of SSD & HDD, and the good news is that you don’t have to choose just one.
SSDs use NAND-based flash memory — similar to, but faster and more reliable than the flash memory used in a USB stick — to store data, while HDDs store data on a spinning platter. SSDs use an integrated processor to access their stored data, while HDDs use a mechanical arm — because SSDs don’t need to rely on a mechanical arm, they’re much faster than HDDs (and because they don’t contain a physical spinning platter, they’re also generally much smaller and less susceptible to mechanical failure). The speed and convenience of SSDs come at a cost, and SSDs are more expensive per gigabyte than HDDs.
Modern SSDs come in two protocols, SATA (the older protocol, which has higher latency and lower peak bandwidth) and Non-Volatile Memory Express* (NVMe*), which utilizes the PCI Express* interface to achieve higher performance.
HDDs come in two form factors, 2.5 inches (more common in laptops, and usually slightly slower at 5400 RPM) and 3.5 inches (more common in desktops, and usually 7200+ RPM).
In addition to traditional SSDs and HDDs, there’s also an option that helps bridge the speed gap: Intel® Optane™ memory storage acceleration. Intel® Optane™ memory uses 3D Xpoint memory technology to accelerate slower drives (primarily HDDs) by storing frequently-used data and access patterns. Intel® Optane™ memory learns which games you use most often and uses that data to boost game launch and level load times.
My Recommendation: WD Velociraptor, Samsung 970 Pro
| Preview | Product | Rating | Price | |
|---|---|---|---|---|
 | WD Velociraptor WD1000DHTZ 1TB 3.5"... | $215.00 | Buy on Amazon | |
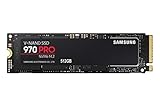 | Samsung 970 PRO SSD 512GB - M.2... | $169.99 | Buy on Amazon |
Last update on 2020-03-20 / Affiliate links / Images from Amazon Product Advertising API
Pro-tip: You don’t have to pick one. Many people use a small SSD as a boot drive (for the operating system, games, and other programs) and fill the rest of their bays with cheap HDDs for maximum storage capacity.
Choosing a Cooling Setup
PCs generate heat, and high-end gaming PCs generate a lot of heat. You will get some default cooling features with your components: GPUs and PSUs have dedicated fans and cases often come with a couple of fans. For non-gaming builds, this bare-minimum of cooling can be okay — but gaming systems usually need extra attention.
There are two main ways to cool your PC: Air and liquid CPU Coolers.
Air cooling uses fans to funnel hot air through your system and away from components to prevent overheating. The main benefits of air cooling are cost and ease-of-installation (fans are smaller and easier to fit inside a crowded chassis). The biggest drawback to air cooling is its limitations: Air cooling depends on efficient airflow inside the case to move hot air away from components, so any air flow restriction can be problematic.
Liquid cooling uses a liquid coolant (such as distilled water) to soak up heat from components and move it to an area that’s less restricted (where the radiator is placed). Liquid cooling is less dependent on airflow inside the chassis, and therefore more efficient at cooling specific components. The downside to liquid cooling is that liquid cooling systems are contained, which means they’re usually larger and more difficult to install than a typical air-cooled setup (they’re also more expensive).
In addition to general system cooling, you’ll also need to purchase a dedicated CPU cooler. CPU coolers come in both air and liquid form factors and mount directly onto your CPU. When shopping for a CPU cooler, it’s important to make sure it’s compatible with your CPU and sized to fit your build.
My Recommendation:
| Preview | Product | Rating | Price | |
|---|---|---|---|---|
 | Thermaltake Riing 12 Series Blue... | $11.97 | Buy on Amazon | |
 | Cooler Master Hyper 212 Evo CPU... | $33.33 | Buy on Amazon | |
 | CORSAIR HYDRO SERIES H60 AIO Liquid... | $79.99 | Buy on Amazon |
Last update on 2020-03-20 / Affiliate links / Images from Amazon Product Advertising API
Pro-tip: In an air-cooled system, more fans does not necessarily mean better cooling. Fan quality and placement make a huge difference in the gaming PC cooling.
Add Other Peripherals
Monitors, keyboards, mice, headphones, and other peripherals mostly come down to personal preference. You don’t need to purchase these items with your components, but you will need a display, a keyboard, and gaming mouse to set up your system after you build it.
Keep build balance in mind when picking peripherals — if you’ve got the best components in the world but you’re still using a 1080p, 60Hz monitor, you won’t be taking full advantage of your hardware.
Troubleshooting Your Gaming PC Build
What, it didn’t turn on? Haha. That happens a lot of times. While building a gaming PC on your own, you’ll face some troubles (everyone does). Don’t worry, it’s not as difficult as it seems.
I have given easy fixes for some of the most common problems that arise while building a PC for gaming. I highly recommend reading these in order to get your build up and running without any troubles.
PC Build won’t turn on? Here’s the fix.
It happens more commonly, so don’t panic! The following the steps below has worked for me more than 95% of times whenever my new gaming PC build does not turn on.
- Validate that all power cables are adequately connected to the three primary locations: (1) 8-pin or 4-pin header, located near the CPU – this is often missed; (2) 24-pin header on the right-side of the board; (3) GPU power cables. Disconnect and reseat these headers, ensure that full contact is made between the pins and that no side is at an angle.
- Reseat the RAM. RAM can often be the cause of “no display” issues. Just because no display is being output does not mean the video card is defective; it could be that something earlier in the boot pipe is preventing ever getting as far as video, and that’s normally RAM.
- Reseat the video card.
- Clear the CMOS battery. Do this by disconnecting power from the system, then remove the silver battery for approximately 15-30 seconds (or use the CLR CMOS switch).
Still No Luck? Try this.
If this didn’t resolve the issue, we’d next suggest going bare-bones. This is done by removing all non-essential components. Essential components include:
- Power Supply
- Motherboard
- CPU
- RAM Sticks
If your CPU does not have an IGP present (motherboard does not have on-board output), you’ll need to include a video card on that list.
Test again. Swap sticks of RAM until all have been independently validated.
Fans On But No Display? Here’s the Fix.
This means your PC is able to get the power, but there’s something with the video output. As we are using the dedicated graphics card, its easy to get this trouble fixed. Here’s how.
- Unplug all the cables from the GPU including the HDMI cable thats connects the monitor, auxilliary power cable (if any).
- Remove the GPU from the PCIe slot.
- If your motherboard has more than one PCIe x16 slot, swap the GPU into the other slot. If there’s just one PCIe slot, reseat the GPU properly in the same slot.
- Connect all the cables once again and try rebooting the system.
If that does not work, remove the graphics card completely and use the VGA port on the motherboard to connect the monitor. If the displays works this time, it means the GPU has compatibility issue with the motherboard.
In case the problem persists, check the problem could be the monitor itself, recheck the monitor by connecting it to other system to make sure the display is working.
Pro-tip: Building a gaming PC for playing a particular game? Here’s a helpful PC Builder tool from iBuyPowerPC where you can select game and corresponding components accordingly.[/su_note]
I am 100% sure that if you will follow the steps I have provided in this post, you will be able to build your gaming PC without much trouble. If you face any issues while building it, drop them in the comments box below, I will address each the issues in the post and resolve them for you!